|
In Computer Modeling and Animation this school year, I have learned a lot. Before I had this class, any Adobe program was just a small thought of, "oh, that's cool, but it looks complicated." Now, the programs that we have covered seem very simple and straightforward, and I can design various designs with ease. I tended to like the projects that encouraged creativity, since I could design a silly idea or something from Legend of Zelda. (The new game came out today and it is GREAT.) This was a huge creative outlet for stress this year and I really loved participating in class. I also know a lot more about digital design in general, which is nice because I can look at a piece of digital art and evaluate the choices that have been made when making the art.
I think the 2D design programs (Photoshop and Illustrator) are my favorites out of this year. I tend to prefer Illustrator, since I can just create things instead of relying on other images like Photoshop does. However, the 2D designs I could create from these programs were really fun to make and I had the ability to make whatever I wanted. I could adjust the color and shape until I had exactly what I wanted and I really loved that, since, in ceramics, that isn't really an option. One of my favorite pieces to make was a Tears of the Kingdom inspired piece that let me play around with the gradient and shapebuilder tools. I also liked Premiere Pro, but I had to work with what I had because the video content was limited in what could actually happen. The only content you could have was limited to the clips you had in the program. I didn't like Animate very much, since it was stupidly complicated and I kept missing a step and backtracking took forever. The melting snowman that I made went relatively quickly, though. However, 3ds Max is really fun to work with. The possibilities are nigh endless, and I can work on making Zelda stuff, like the Decayed Master Sword. The lighting and camera possibilities are cool as well. I really like the freedom this program offers as well and I can't wait to explore it a bit more. If I ever use these skills outside of this class, it will either be to design pin designs for robotics next year, make a good website, or make art just for the fun of it. Something that has been going on all year has been my countdown for Tears of the Kingdom. I absolutely cannot wait to go home to play it some more and explore the new world. Another thing I drew pleasure in during this class was being nitpicky with the grammar and other items within my teacher's instructions. One such example is the unneeded citation at the bottom of the End of Quarter 4 Portfolio Check. There is no burger image in this portfolio check, so there is no need to cite it.
1 Comment
Mathematically, this car is very slow. It takes 12 hours to travel over a 800 foot long road, which means that it travels at a speed of 0.0126 mph. Anyways, placing the lights and cameras into the scene was very simple. The directions and program were straightforward and easy to follow. The target camera and sun rays were interesting because the targets were separate from the items. This allowed the sun rays to rotate around the plane and the target camera to follow the car from a fixed location. Using an instance to copy the headlights was smart because it meant you only had to change the properties of one to affect the other.
There is one week left until Tears of the Kingdom comes out and I am SO EXCITED!! In celebration of this phenomenal milestone, I made the tears in Tears of the Kingdom. Sadly, only two are accurate with their patterns because there are only two that can be zoomed in close enough to see the patterns in the trailers. And some of the colors are guesses too, since the trailers haven't shown all of them physically yet. However, in the first trailer, there is a mural on a wall that depicts seven tears, which leads me to believe that the rest of the physical tears that were not seen in the last trailer would follow the rest of the colors of the rainbow. I had fun making these and made the patterns on the tears with the use of rectangles, circles, and the shapebuilding tool. I then made the gradients and placed them in the fill for the tear shape that took me forever to get right. I also arranged the tears in a rainbow pattern that also aligned with the Triforce. Since Ganon holds the Triforce of Power, the top triangle, and also the red tear, I placed them near each other. Zelda holds the Triforce of Widom and the yellow tear, so they were near each other too. Link hasn't been seen with a tear yet, so I don't know what color it is, but it isn't red, orange, yellow, green, or blue because those are held by other people. If the theory of the rainbow colors of the tears is accurate, then Link will probably end up with the indigo tear, both because it is closest to his classic green color and purple just doesn't fit his asthetic. It is interesting to note, though, that if this is correct, that his color is shifting again. In all the previous games, Link and the Triforce of Courage were associated with the color green. In Breath of the Wild, his color shifted to a bright blue only seen sorta similarly in Wind Waker. Changing his color yet again would be an interesting choice. 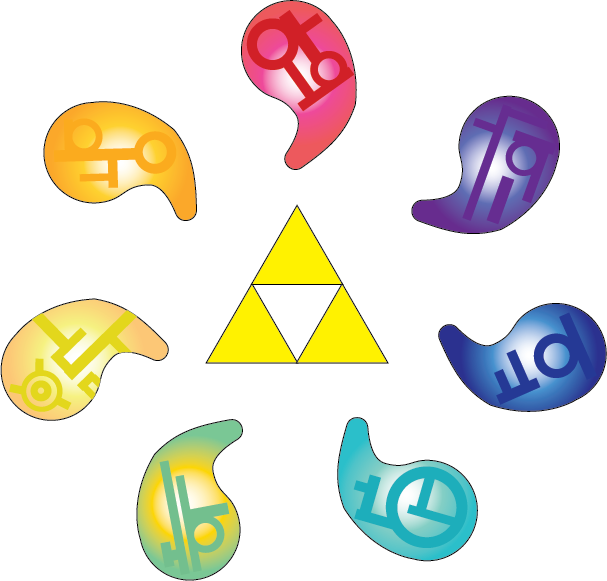
For this project, a car, a road, and a path down the road was imported into the 4 corners scene. I had to rotate and downscale the track a bit so that it fit in between the items in the corners. I also had to downscale the car because it was huge and I sized it to fit the road, which made it a one-way road. From there, I just followed the videos to make it drive along the road properly. I had to flip it around so that is wasn't driving backwards, which would turn any road trip into something a bit more exciting.
I think that any naturally occurring scene would obviously look like this. Every area of the world obviously started out like this and was then corrupted to look like it is now. To make this, I used the modifier of Edit Poly a lot to make the shapes distinct and to change the heights of the stems of the mushrooms and flowers. Noise and MeshSmooth were nice because they made the mushrooms and rocks look a bit more natural, but I still think my rocks are weird. Oh well. 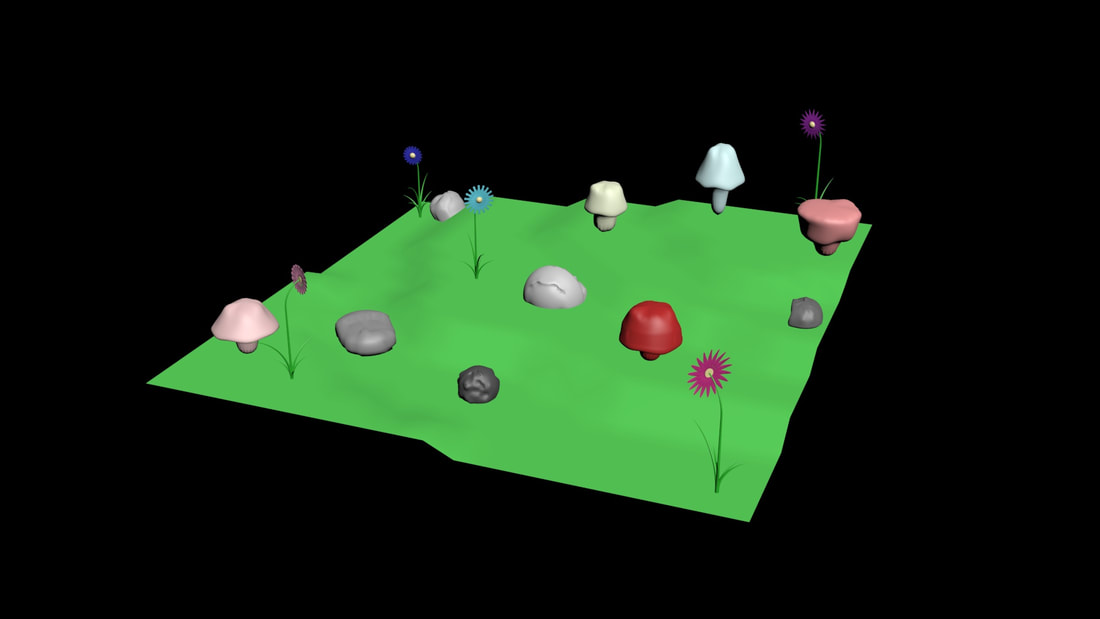 This tank was made from one box while following the assigned video. I also made the turret hollow because it is generally hard to propel objects through solid material from a velocity of 0 m/s. Since there is no velocity, there is no force that is acting upon the object or there are multiple forces acting upon it that cancel each other out, like the force of gravity and the force of the ground pushing the tank and the various assorted ammo in the tank up. Physics yay. 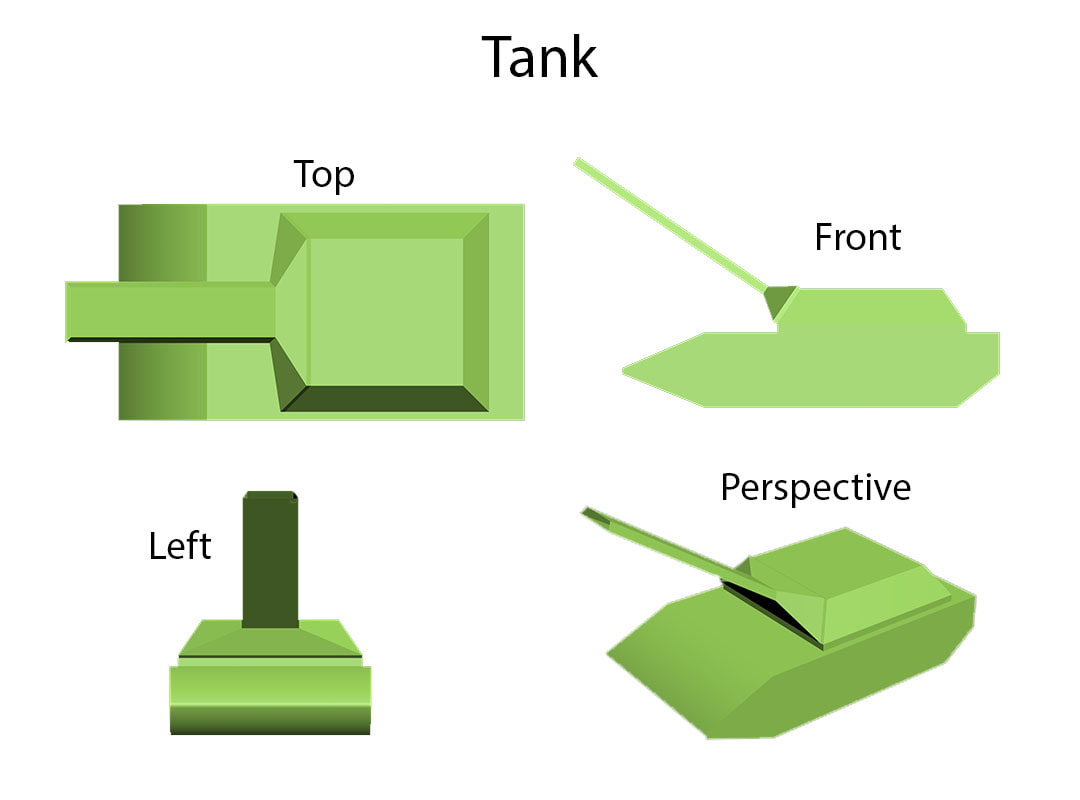 Somehow, the spline for the pawn decided that it was going to be in all three dimensions and that understandable handles were old school. I had to start over on that one, but that's fine. I also decided to fix the screw because the one in the tutorial was SO WRONG it pained me. I also made the wineglass purple because I felt like it. Overall, though, I had fun with the modify tools like lathe and the compound objects like ProBoolean. 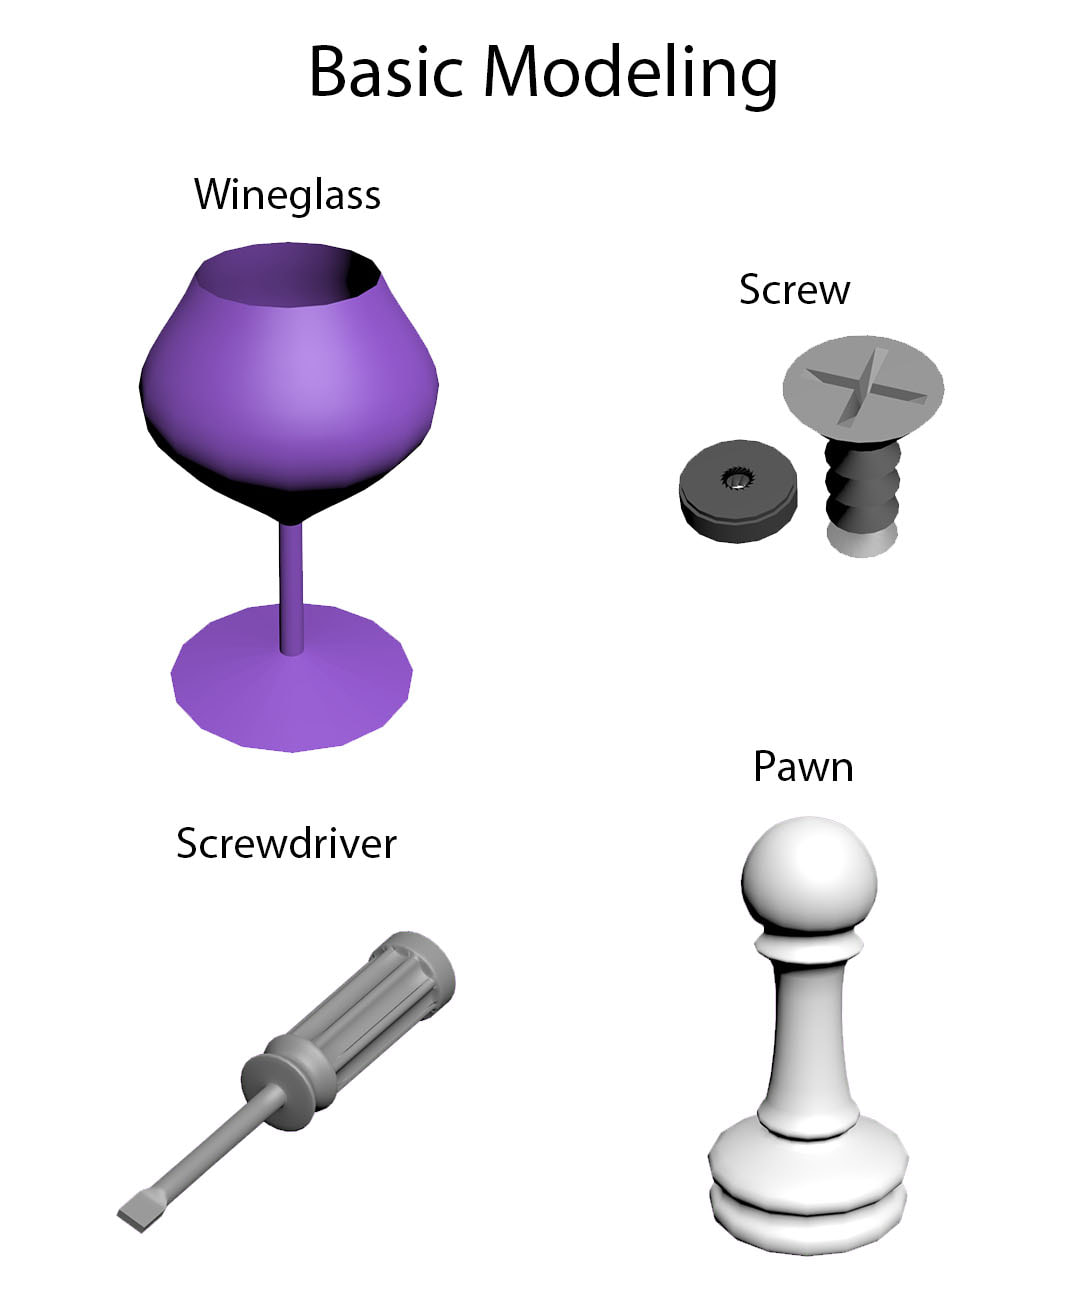 This scene was simple to make since it only involved plugging numbers in. I had to use the keyboard entry option to make the shapes the right size without wasting time making the object and then sizing it. I also used that option to put the objects in the right place in the coordinate grid. However, to rotate the objects that needed rotating, I had to use the Rotate tool. I also had to link all of the objects to the plane. After that, I was done. This took like 30 minutes to do and was super simple.  For my first 3D modeling assignment, I had to make a snowman and a pencil. As you can tell, my snowman is very dignified because he has such a tall hat. My pencil, however, is just a mere peasant, for it has no hat. To make these two items of varying dignity, I had to use basic primitives like a sphere, cylinder, box, cone, or torus. When arranged in a certain way, these basic shapes come together to form complex objects, like a snowman or a pencil. To get even more complicated, you can make people or large houses or scenery. 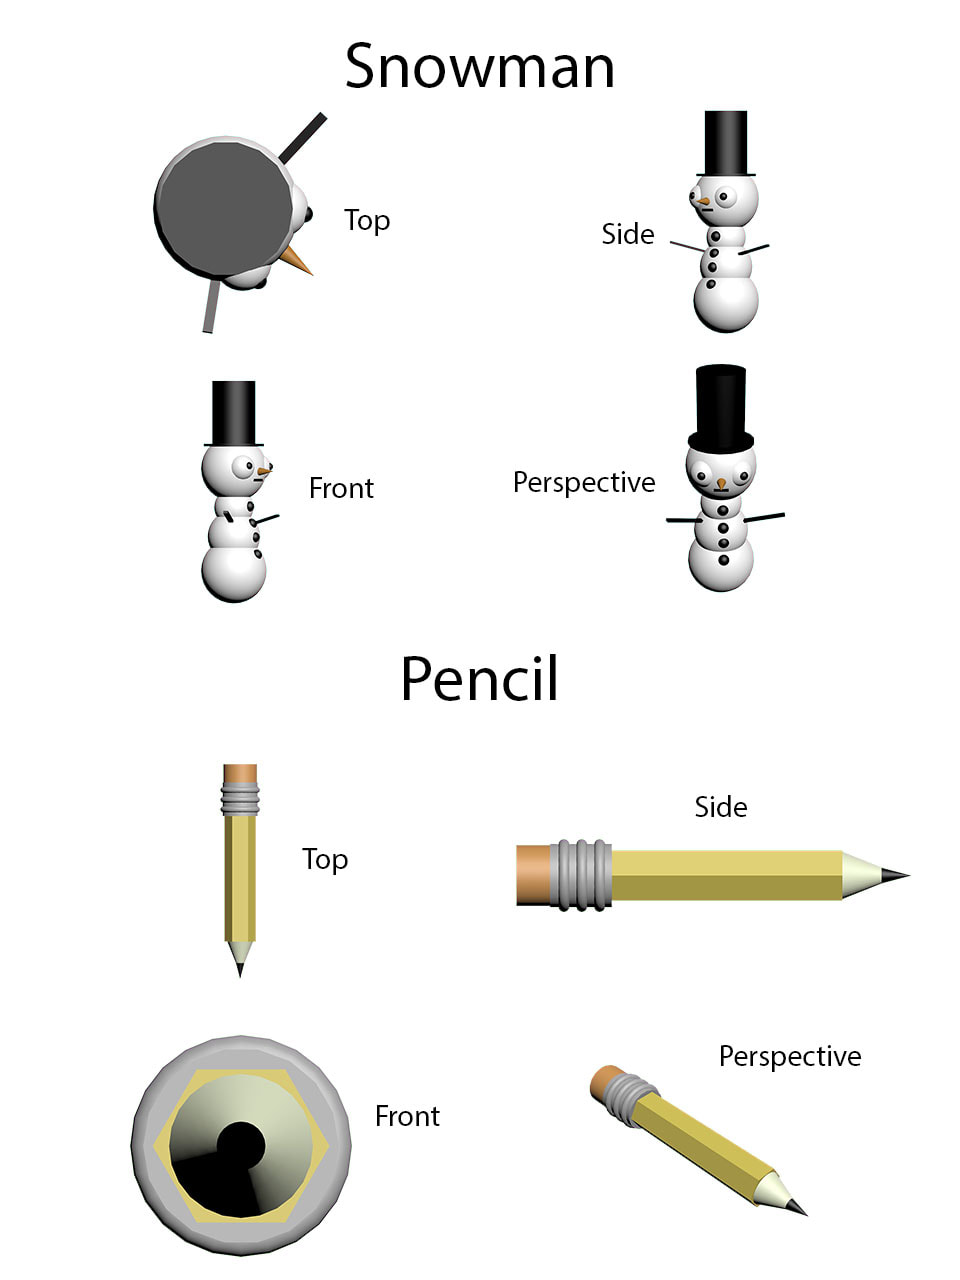 For my coordinates, I plotted the Pokémon Deerling. I quickly got annoyed with counting all the points but was too anxious to trust the math I was doing in my head. I did have fun seeing it all come together because I plotted it as I went to ensure that I didn't miss anything. To determine the coordinates to pick, I picked points that lined up the best with graph and that were also points that were on an edge between two colors or where the shape of the Pokémon changed direction. From the instructions I was given, I created Cuphead. He has no pupils or body, so he looks a little funky. I also have never heard of Cuphead and someone else had to identify him, but oh well. The way the instructions were displayed was clear and easy to follow. It was also really easy to color because Cuphead is red and white, so I only had to color four areas red. 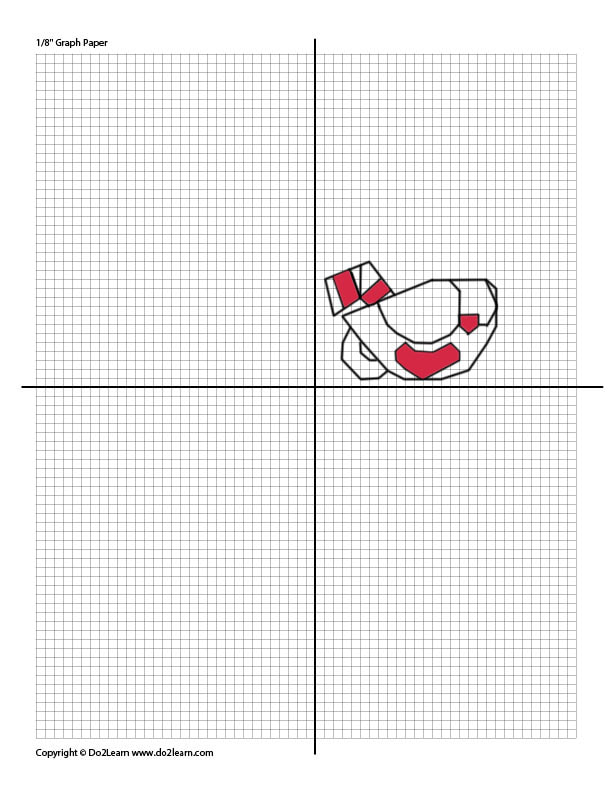 |
